No products in the cart.
What to Do to Unclog a Drain:

How much water do you use each day?
Research shows, the average American household uses over 300 gallons of water every day. Most of the water you use takes place inside. For instance, showers and faucets account for 39% of indoor water usage!
Do you need to unclog the drain in your kitchen or bathroom? If yes, you’re in the right place!
In this article, we’ll teach you the right techniques and tools to help you quickly unplug your stopped-up drain. We’ll even give you a few pro tips to help prevent future clogs from happening.
Read on to learn how to unclog your drain, the right way.
1. Determine What Could Be Causing the Clog
The first step to unclog the drain is to try and figure out what’s causing the clog. Here are a few of the most common drain clogging culprits:
- Dirt
- Soap
- Hair
- Food debris
- Misc small objects
- Toilet paper buildup
- Mineral buildup
Is soap or dirt is causing the clog? If so, you might be able to get away with only using a drain cleaner or hot water.
Identify the Clog Spot
Moving on, you’ll need to determine exactly where the clog’s taking place. Common clog spots include traps, drainpipes, and internal passages.
2. Remove the Drain Cover
Oftentimes sink and shower drain covers have a pop-up design. To remove a pop-up drain cover, you won’t need any tools.
Simply pull the drain cover straight off, and set it somewhere safe. However, keep in mind that since the cover fits the drain snugly, you may have to wiggle it a bit to get loose enough to remove.
If you’re dealing with a screw in drain cover, which looks like a strainer, you’ll need to get a screwdriver. Once you unscrew the cover you can easily remove it from the drain.
Finally, do you have a shower drain that can open and close with the touch of your toe? For this type of drain, you’ll first need to place the drain in the open position.
Next, gently unscrew the drain cover it, and remove the cap. In some cases, an open/close drain cover will require a screwdriver. YOu can use the screwdriver to pry into the side of the drain cover until it begins to pop out of place.
Look for Visible Clogs
One of the advantages of unclogging a shower or sink, as opposed to a clogged washing machine, is that you can easily look for visible clogs. Now that you have the drain cover off, shine a flashlight down the opening.
Do you see any hair or debris that’s causing the blockage? By identifying what’s causing the blockage, you’ll have a better idea of how to approach the clog.
For instance, you might notice there’s something jammed down the pipe. If it’s a large foreign object, you may need to reach out to a professional to help remove it.
If you can’t see any visible clogs, don’t worry! You can still move forward with the unclogging process.
3. Cover Overflow Openings
Your sink may have an overflow opening to protect your home from water damage. After all, water damage can cost homeowners as much as $3.75 per square foot for restoration services!
Before you can successfully plunge your drain, you’ll first need to cover the overflow opening completely. By covering the overflow drain, you’ll be able to create the suction you need with the plunger.
We suggest you use duct tape to make covering the overflow drain easy. However, when you’re all down unclogging the drain, be sure to remove the duct tape completely.
4. Plunge the Drain
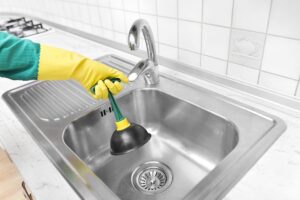
Now you’re ready to try your hand at plunging! First, position the plunger over the drain. The lip of the plunger should be firmly against the surface of your tub or sink.
You have to create a good cup seal to get the suction you’ll need. Once the entire lip of the cup seals is in position over the drain you can start plunging. For the most effective plunging session, you’ll want to use fast, powerful strokes.
Next, quickly push the plunger down and pull it up. After 7-8 plungers, try running some water down the drain. Is the drain flowing freely?
If yes, you’ve successfully unclogged the drain! If the water doesn’t drain normally, move on to the next step.
5. How to Unclog a Drain With Hot Water
Now that you’re done plunging, you’re ready to try pouring boiling water down the clogged drain. However, keep in mind that bubbling water isn’t necessarily hot enough.
Studies show water can start to bubble at temperatures as low as 160 F. Whereas, boiling water has a temperature of 212 F.
To make sure you’re using water that’s hot enough, wait a few minutes after it starts to boil before removing it from your stovetop. Next, carefully, and slowly, pour the hot water down your drain. You may want to wear safety glasses in case any of the hot water splashes back onto your face.
When to Not Use Boiling Water
Not all pipes can withstand the high temperatures of boiling water. Water pipes that are PVC, Pex, or CPVC can’t handle boiling water. Instead, you’ll need to use a drain cleaner.
6. Try a Chemical Drain Cleaner
While the plunging and hot water may have not fixed the clog, you’ve probably loosened things up! Using a drain cleaner could be the final touch you need to get things flowing freely again.

Here are a few tips to help you safely use your drain cleaner:
- Follow label instructions
- Don’t use multiple cleaners
- Wear safety glasses
- Open a window
In addition to following the safety tips above, you should also take the time to pick the right type of drain cleaner.
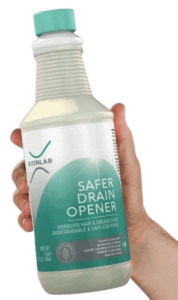
https://xionlab.com/xionlab-safer-drain-clog-remover
Tips for Choosing Good Drain Cleaner
There are solid and liquid cleaners you can use as a drain unclogger. The 3 main types of drain cleaners are oxidizing, acid-based, and caustic.
All 3 types are effective at removing even the toughest of clogs. However, remember, you should only work with 1 drain cleaner, to avoid causing harmful chemical interactions.
7. Take Apart the Drain Trap
Did you try everything in this article and you still have a clogged drain? If yes, it’s time to take apart the sink trap. The drain trap is the bent portion of pipe that looks like a “U” or “L” under the sink.
First, get a pair of rubber gloves to protect your hands from any lingering chemicals. Next, place a bucket under the sink trap. The bucket will make your cleanup process easier since water and debris are likely to fall out of the drain trap.
Moving on, you’ll need to carefully unscrew the metal slip nuts. Once the slip nuts are loose you can finish removing them by hand.
Some traps will have a cleanout plug rather than slip nuts. For cleanout plugs simply remove the plug and let the blockage spill out.
Holding the trap pipe in your hand, knock out any remaining gunk. Finally, replace the sink trap, and tighten the slip nuts with a wrench or pliers. Hopefully, after cleaning out the sink trap, you’ll have an unclogged drain.
8. Predict Future Clogs
Once your drain’s completely clean, the next step is to keep an eye out for future clogs. Here are a few warning signs to help you predict future clogs:
- Odd smells
- Weird sounds
- Slow drainage
If you’re smelling an unpleasant odor by one of your drains, it’s likely a clog is beginning to form. If the smells are in your kitchen sink, using a garbage disposal cleaner with a deodorizer is your best option.
Another warning sign is gurgling sounds in your plumbing. Instead of waiting for things to get worse, be proactive by using a drain cleaner.
Enjoy Free Flowing Water
Now you know how to unclog the drain in your kitchen or bathroom! What’s 1 new thing you were able to learn from our article today?
Were you surprised to find out that fixing a clog can be as easy as finding a safe drain cleaner? Or how about how you can prevent future clogs by identifying blockage warning signs?
Here at Xion Lab, we’re all about developing safe products that work. Go ahead and take a moment to check out our environmentally friendly drain cleaner. When you place your order, we’ll be happy to give you free shipping!
Do you have any questions we didn’t answer in this article? Reach out to us today using our contact us page, we’d love to hear from you!
