No products in the cart.
Surface Preparation for Rust Treatment (2026 Guide) — How to Prep Metal Before Rust Converter or Topcoat
May 23, 2026
By Xion Lab
Free Shipping
easy returns
secure paymentS
FAQ | MY ACCOUNT | SUPPORT
May 23, 2026
By Xion Lab
Field-tested surface prep workflows, AMPP/SSPC standards explained in plain English, and the eight prep mistakes I keep seeing on real jobs.
Quick Answer: Surface preparation for rust treatment means stripping loose rust, mill scale, oil, salt, and moisture down to a sound, profiled substrate — usually SSPC SP 2 or SP 3 cleanliness for most field jobs. Skip it and even the best rust converter peels inside a season. Get it right and you can stretch a coating life past a decade.
Rust treatment lives or dies on the metal underneath. Industry research from AMPP and Sherwin-Williams attributes roughly 60% to 80% of all coating failures to poor surface preparation, not bad product. So when a fresh coat blisters, peels, or flash-rusts a week later, the bottle gets blamed unfairly.
Prep matters more for rust converters than for ordinary paint. A converter has to react with adherent rust, bind with bare steel, and seal off moisture in a single pass. Block any of those steps with grease, dust, chloride salt, or stray water, and the chemistry stalls.
Good prep delivers three rewards — a clean substrate, an anchor profile the chemistry can grip, and a reaction window your converter can actually use.
of coating failures trace back to inadequate surface preparation, per industry research from AMPP and major manufacturers.
If you have ever read a paint spec and seen “SP 3 minimum” or “SP 10 commercial blast,” those codes come from the SSPC standards now stewarded by AMPP. The cleanliness level matters because different products demand different starting points.
Here is a plain-English rundown of the levels you will run into on most rust jobs.
| Standard | Method | What Remains | Typical Use |
|---|---|---|---|
| SP 1 | Solvent cleaning | Rust, scale, paint | Pre-step for every other level — removes oil and grease only |
| SP 2 | Hand tool | Tight rust, tight mill scale | Maintenance work, atmospheric coatings, small touch-ups |
| SP 3 | Power tool | Tight rust, tight mill scale | The workhorse for shop and field rust converter jobs |
| SP 6 | Commercial blast | Random light staining | Industrial recoats and tank exteriors |
| SP 10 | Near-white blast | Light staining on max 5% | Marine, immersion, severe service |
| SP 11 | Power tool to bare metal | Nothing — bare clean steel | Bridge maintenance, spot repair on rusted areas |
For most DIY and contractor rust jobs, SP 2 or SP 3 is the realistic target. SP 11 is fantastic but slow. SP 10 needs blasting equipment most homeowners do not own.
The good news? A rust converter like XionLab is formulated for SP 2 and SP 3 conditions — adherent rust still on the surface, no blasting required.
I’ve prepped everything from trailer frames in the Florida Panhandle to wrought iron railings outside Pittsburgh row houses. The sequence below is the one I keep coming back to. It works because each step solves a different failure mode.
Walk the surface before touching it. Look for delamination, deep pits, perforation, or hidden cracks under rust scale. Tap suspect areas with a small ball-peen hammer. A solid ring means sound steel. A muffled thud usually means metal loss underneath.
If you find perforation, no rust converter will fix it. Cut and weld the section, or patch it before continuing.
Every SSPC standard above SP 1 assumes the surface is already free of oil and grease. Yet most failures I see start with someone skipping this step.
Wipe the entire area with mineral spirits or a dedicated metal prep solvent. Use clean, lint-free rags and turn them often. Dirty rags just redistribute contamination. For coastal jobs, follow the solvent wipe with a fresh-water rinse to flush chloride salt out of pits, then let it dry completely.
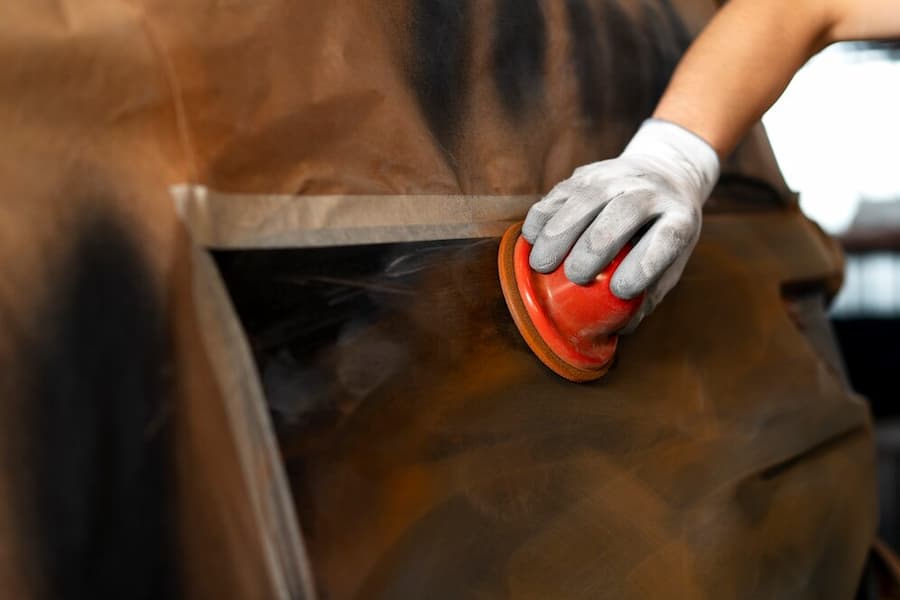
Now go after the loose stuff. For SP 2, use a stiff wire brush, scraper, and sandpaper. For SP 3, reach for an angle grinder with a wire cup or flap disc, a needle scaler, or a die grinder for tight corners.
Work in overlapping passes. Lift off loose flakes and pulverized rust. Stop when remaining rust no longer comes off with a putty knife — that is your “tight rust” baseline. A converter needs adherent rust to react with, so do not chase bare metal on every square inch.
Wire-wheel residue is the silent saboteur of converter bond. Powdery debris looks harmless. Magnified, it reveals a friable parting layer of pulverized oxide ready to crumble underneath your fresh film.
Vacuum first with a soft brush attachment. Follow with compressed air at 80 to 100 psi. Then wipe across the substrate using a tack cloth or fresh solvent-dampened microfiber. Three passes. Never just one.
Steel temperature should sit at least 5°F above the dew point. Otherwise condensation forms on the surface as you work, and the converter blisters before it can react.
A cheap infrared thermometer and a sling psychrometer answer this in two minutes. Or use a digital surface dew point meter if you do this often. The reading might surprise you on a foggy morning.
Tooling does not have to be exotic. But the right cup brush or flap disc cuts your prep time in half. Here is what I keep in the truck.
Coatings stick mechanically as well as chemically. Tiny peaks and valleys on the steel surface — the anchor profile — give the coating something to grip. A mirror-smooth steel surface is actually a poor substrate. Counterintuitive but true.
For converters and primers, a 1 to 2 mil profile works well. Coarse wire cups, flap discs in the 40 to 80 grit range, or a light pass with garnet abrasive all produce this naturally. Roughness beats glossy smoothness underneath any protective film. You do not need an enclosed blast cabinet for typical rust jobs.
Want to know why a converter “did not work”? Nine times out of ten, the prep failed first. Here are the eight repeat offenders I’ve documented over years of coating callbacks.
annual global cost of corrosion, per the NACE/AMPP IMPACT study — roughly 3.4% of global GDP. Better prep alone could recover 15–35% of that figure.
Not all converters are equal. XionLab 2-in-1 Rust Converter & Metal Primer is engineered to give properly prepped surfaces a serious payback. Here is what the formula does once the prep is right.
Tannic and phosphoric acids work in tandem. They reach into pit bottoms most single-acid converters miss.
One coat, one product. Skip the separate primer step that often introduces new contamination.
Polymer matrix seals out chloride re-contamination after application. Tested through Gulf Coast hurricane seasons.
Soap-and-water cleanup. No solvent stink. Safe for indoor garage work even with kids around.
Iron, steel, galvanized, weathering steel, and even some non-ferrous surfaces. One bottle covers most jobs.
The cured film blocks oxygen and moisture for years. Topcoat for UV protection when needed.
You can find the full product details on the XionLab 2-in-1 Rust Converter and Metal Primer page.
I’ll be straight here. Other rust converters work. Some are quite good for specific jobs. Here is how the main players stack up against XionLab in my experience.
| Approach | Best At | Where It Falls Short | Verdict |
|---|---|---|---|
| Corroseal (water-based) | Light to moderate surface rust on flat panels | Slower on heavy scale, separate primer often needed | Solid for lighter work; XionLab pulls ahead on deep pitting and harsh climates |
| POR-15 | High-build, durable shell over rust | UV sensitive, demanding moisture window, requires topcoat | Great for frame rails; less forgiving on application than XionLab |
| Ospho / Permatex (phosphoric only) | Quick chemical etch on light rust | Single acid, no built-in primer, requires careful neutralization | Workable for spot prep; not a complete system like XionLab |
| Naval Jelly | Vertical surfaces, hand application | Aggressive acid, short working time, not a primer | Useful for prep; not a long-term converter |
| XionLab 2-in-1 | Heavy rust through pits, all-climate, single-product system | Needs solid prep like any converter | The best all-around choice for SP 2 / SP 3 jobs |
Each has its place. But for the typical homeowner or contractor working on rusted automotive panels, fencing, tools, or marine fittings, the 2-in-1 approach saves a step and cures the most common failure mode — contamination introduced between converter and primer coats.
Honest moment. No converter or prep workflow restores metal that is already gone.
The good news? For everything short of those four scenarios, a clean prep plus a quality converter handles it.
Where you work changes how you prep. The same trailer frame in Tucson and in Tampa needs two different approaches. Climate is not a footnote — it is the main variable.
Winter road salt is the enemy. Chlorides drive deep into pits and crevices. Add an aggressive fresh-water rinse and a soluble salt test before applying any converter. A simple Bresle patch or chloride test strip costs a few dollars and saves a recoat.
Humidity is the variable here. Dew point will catch you off guard on summer mornings. Prep early, apply by 10 a.m., or you will be working over flash rust by lunchtime. Tarp the work area if a stray shower threatens.
Persistent damp and moss complicate everything. Pressure wash, scrub with a degreasing solution, then wait for two consecutive dry days. The substrate has to feel cool and dry, not just look dry.
Heat is the catch. Steel surfaces hit 150°F by midday. The carrier flashes off the converter before reaction. Work in early morning or late afternoon. Pre-cool with a light shaded mist if you have to do midday work.
Once prep is done, the clock starts. Apply the converter within four hours. The cleaner the steel, the faster the flash rust window. A four-hour gap usually works in cool, dry weather. Cut it to two hours on a humid coast.
Brush, roller, or low-pressure spray all work for XionLab. Two thin coats outperform one heavy coat. The first reacts and bites. The second seals.
For a step-by-step walkthrough of the application phase, see our complete rust converter application guide. For the chemistry behind why this works, check the science of rust converters and primers.
Already prepping an automotive job? Our automotive rust converter guide covers panel and chassis specifics. For marine work, see the marine corrosion treatment guide.
One coat. Done. Then the topcoat goes over once the converter cures.
Last September I helped a friend in Mobile, Alabama redo the rust on his 1990s GMC pickup bed. The rails were rough — about a quarter-inch of crusty oxide along the wheel wells, salt-driven from years of beach trips. Other converters had peeled in under a year. The prep approach made the difference.
We did it as a Saturday morning job before the heat climbed. Solvent wipe, then a fresh-water rinse to flush chloride, then four hours of patient angle grinder work with a knot wire cup. Vacuum. Compressed air. Tack rag. Two coats of XionLab brushed on by 10 a.m. while the steel sat at about 78°F. Six months in, the conversion still looks fresh. No bubbles. No bleed-through.
The truck has not seen another winter season of salt yet. But early indicators suggest patience, methodical sequencing, and disciplined cleanliness paid off handsomely.
No. A converter actually needs adherent rust to react with. Remove only loose flakes, pulverized rust, and mill scale. Tight rust stays. SP 2 or SP 3 cleanliness is the target for most jobs.
Pressure washing alone leaves oily residue behind. Use a degreaser concentrate with the wash, rinse with fresh water, then dry the surface fully before any mechanical prep. For chloride-contaminated steel, the fresh-water rinse is critical.
Four hours in cool, dry conditions. Two hours in humid coastal weather. Bare steel flash-rusts quickly, and a fresh oxide layer changes how the converter reacts. Plan the day so prep and application happen in one session.
40 to 80 grit gives a 1 to 2 mil anchor profile, which is the sweet spot for converters and primers. Finer grits leave the surface too smooth for good mechanical adhesion. Coarser grits remove more material than necessary.
For typical maintenance work, yes. SP 6 commercial blast costs more in equipment and cleanup than the converter itself saves. Save blasting for severe service, marine immersion, or jobs spec’d for SP 10. Most automotive and structural rust work tops out at SP 3.
Three usual suspects: trapped moisture in pits, oil contamination missed during prep, or chloride salt left in the rust. Re-check each one. Steel temperature below dew point is the fourth cause and the easiest to overlook.
Not exactly. Galvanized surfaces need a light scuff and a degrease, not aggressive wire wheeling. Stripping the zinc layer defeats the purpose. XionLab adheres to lightly weathered galvanized after a 220-grit scuff and solvent wipe.
Stop and patch first. A converter binds with sound metal. Where the metal is gone, the converter has nothing to grip. Weld in a patch panel or use a structural epoxy filler with mesh backing, then continue prep on the repaired area.
For pure phosphoric products like Ospho, yes — rinse and dry. For dual-acid systems with built-in polymer like XionLab, no separate neutralization is required. The carrier and the polymer matrix handle it. Always check the data sheet for your specific product.
Pair clean, properly prepped steel with XionLab 2-in-1 Rust Converter & Metal Primer for the most durable rust treatment available — water-based, low-VOC, and engineered for SP 2 / SP 3 conditions.